Wireshark's little known Snort post-dissector

Snort rules are considered the gold standard of Network Intrusion Detection signatures, and because of that it is important for new analysts to learn how to read and understand the logic of them. These days, there are a ton of great blogs already on understanding them, such as this one by Rapid7.
But did you know that you can use Wireshark to find which specific packet triggered a Snort rule within a few seconds, from within the Wireshark GUI giving you all of the surrounding context that a PCAP can give you.
Background
For those that may not be familiar Wireshark and Snort, I thought it may be helpful to give a brief overview. If you're already familiar with Snort and Wireshark - skip ahead to the Getting Started section.
Snort
![]()
Snort is one of the most commonly deployed Network Intrusion Detection Systems (NIDS). At an extremely high level, it runs a set of rules against each packet, and if there is a match alerts the security team.
You can find more about it at the Snort site https://www.snort.org/
Note: Snort is more commonly deployed as a part of the https://securityonionsolutions.com/.
Wireshark
Wireshark is the most popular GUI tool for analyzing Network Packet data. It is incredibly common to use on the job, and has a huge feature set of which most people do not know about.
Wireshark post-dissector's
Wireshark has the concept of dissectors which are meant to analyze some part of a packets data. They are typically used to analyze and view custom or maybe new network protocols.
Fortunately for all of us, someone was an absolute legend and came up with the idea of using Wireshark's built in post-dissector feature to run Snort against the PCAP you may be looking at.
You can read more about Wireshark dissectors here:
Getting Started
So now that we know what both are - lets go into how we can use Wireshark to easily search for Snort alerts within a PCAP file.
Requirements
Ultimately all you need is a Linux VM with an up-to-date version of both Snort and Wireshark. If you use Ubuntu 20.04 Desktop or newer, the versions within the apt repository should work just fine.
Hardware
- 2 CPU Cores
- 4 Gb/ RAM
- 50+ Gb Storage
Note: Wireshark loads the PCAP into memory - if you have a giant PCAP, you may need to increase the amount of ram within the VM that you create
Software
- Ubuntu 20.04 Desktop Linux VM (or newer)
- Snort
- Wireshark
# Setup an Ubuntu 20.04 Desktop Linux VM
# Update the VM:
sudo apt update && sudo apt upgrade -y

# Install wireshark - the defaults here should work
sudo apt install wireshark

# Install snort - you can accept all of the defaults again however
# you will want to update the $HOME_NET variables to match the PCAP
# being examined. You'll also be prompted to select an interface
# to listen on twice by default, it will be set to eth0 however
# you can delete this and leave it blank
sudo apt install snort

shutdown -r 0
If you'd like to add custom rules, or use the ET Pro / ET Open rule-sets, you can modify the rules at /etc/snort/rules don't forget to update the snort.conf file at /etc/snort/snort.conf - this is also where you'd modify the $HOME_NET and EXTERNAL_NET variables if necessary.
Configuring Wireshark
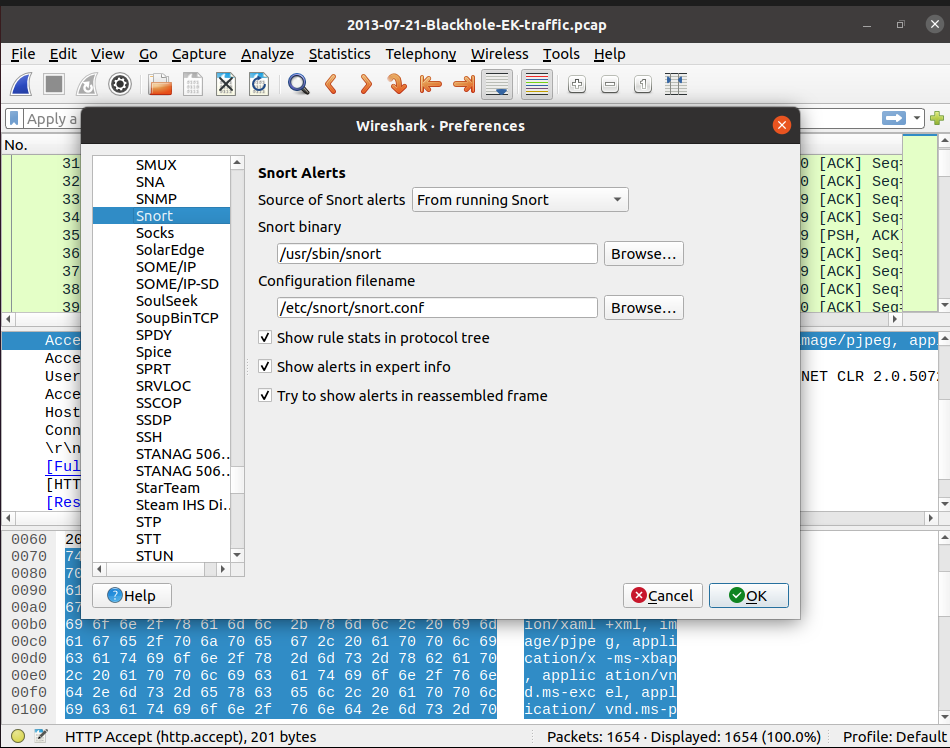
Now - we'll need to configure Wireshark to see our Snort binary as well as a few other settings. Goto Edit > Preferences > Protocols > Snort and configure it to match the below image and restart Wireshark:
Searching Wireshark for Snort Alerts
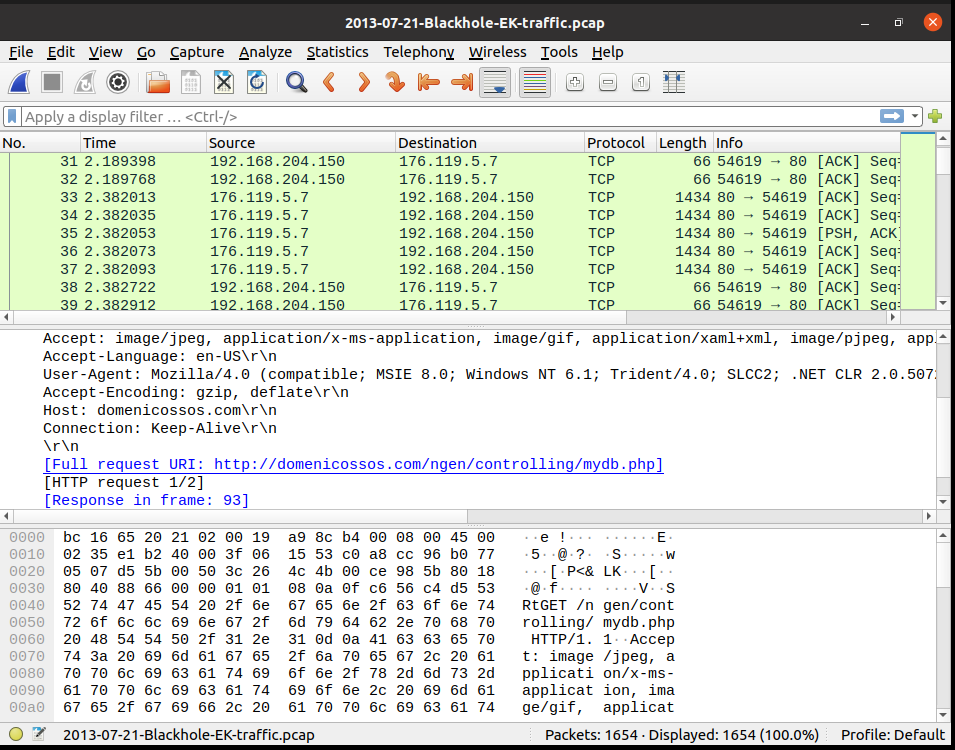
Now that we've got everything configured, launch Wireshark as root (this can be done via the terminal - sudo wireshark) and open the PCAP you want to analyze.
Once done - simply type snort into the Wireshark filter bar and you'll see a list of all of the packets that have triggered a Snort alert.
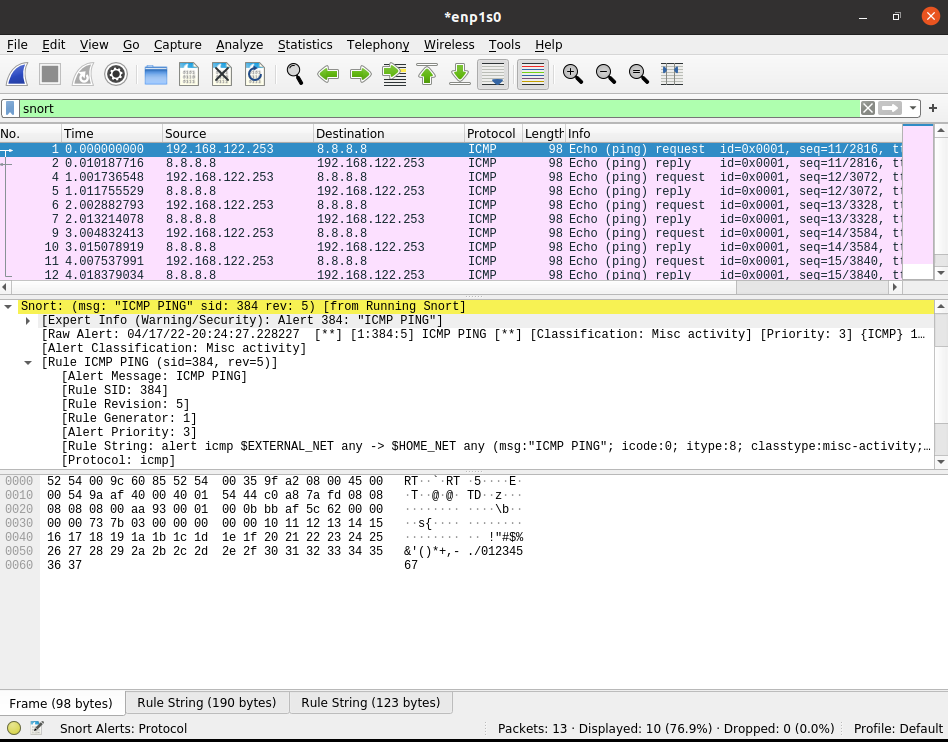
You'll also notice in the middle Wireshark pane - a snort section with various information on the Snort rule(s) in question that triggered (how sick as that?!).
If this is something you'd use frequently - consider identifying which snort fields are useful, and right click > set as column which can make it easy to quickly see which packets have triggered an alert, and which alert it was as pictured below.
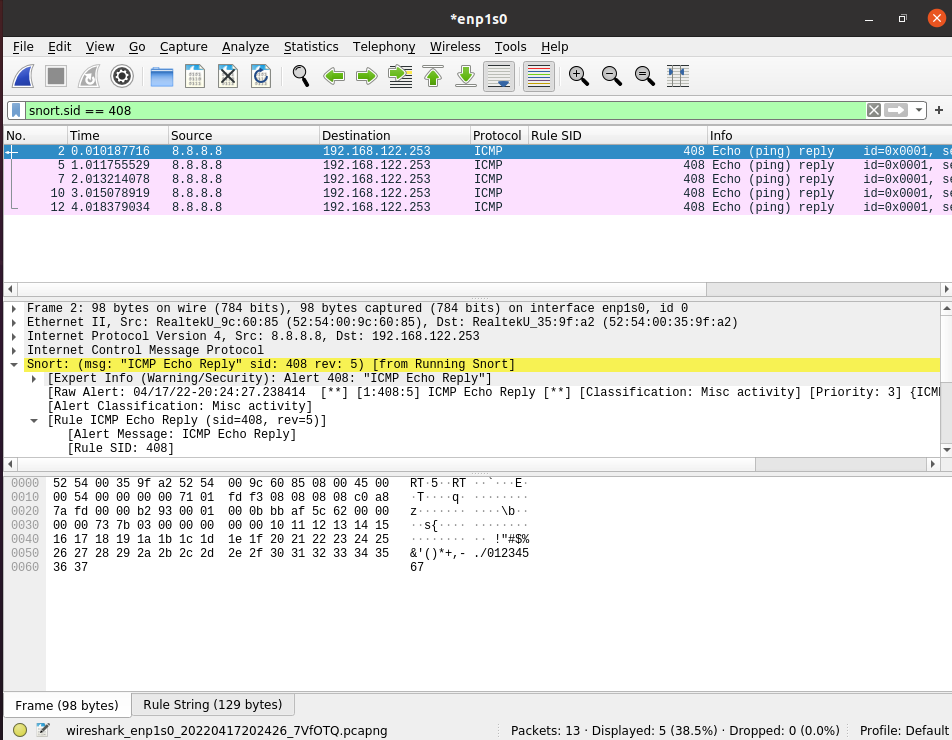
Lastly - there are a ton of various fields you can search the PCAP on related to Snort - such as the sid as pictured above. For a full reference, check the Wireshark Display Filter documentation: https://www.wireshark.org/docs/dfref/s/snort.html
But we use Suricata...
Unfortunately at this time there isn't a Suricata post-dissector. But all is not lost! Fortunately - most of the ET Pro / ET Open Suricata rules have a corresponding Snort rule. If you're using the ET Pro / ET Open rulesets with Suricata, you can still follow this guide and search for it's corresponding Snort SID.
Final Thoughts
Boom - you've now used Wireshark to quickly analyze a PCAP for any Snort Intrustion Detection System alerts that may have triggered in seconds. Consider replacing the default ruleset with one such as the ET Pro / ET Open rulesets to extend this capability further.
If this blew your mind (like it did mine when I learned it existed) than be sure to share this post to help others!
Find a technical error in a blog post?
Contact me on BlueSky @signalblur